Showing posts with label PSE8. Show all posts

Wednesday, April 20, 2011

How to quickly make a perfect group shot from a couple of images?


It happens alot of times that while taking a group shot, there is atleast one person who is looking somewhere else. So we ask to pose for another shot. However now someone else from the group is not in perfect smile or moving his hands here or there.

Getting a perfect group shot is too simple using PSE.

1. Open the two group shots which are not so perfect and go to File>New> Photomerge Group Shot or Guided Edit > Photomerge> Group Shot

For example :


The above screen appears. Select the base image where most of the people appear perfect and drag it to the empty space on the right where as the source image at left.


If you see the above pictures you would notice that in right image(our base image) , the person on the left has his arm raised. While in the left image, the person at the back has his arms raised.

So we want to have one picture out of these two were none of the guys have their arms raised.

2. Select the pencil tool from right panel and create a selection like the one show below (V-Shaped), where I selected the person on left who appears fine.


As soon as you leave the mouse drag, you would see the results as shown :


But if you see closely, there is a problem in this result which is highlighted as shown below :

Problem highlighted in pink box

So the person highlighted in pink box is having another arm in the result image on right.

It is just one more step. Just select the eraser tool from right panel and rub over the arm area in the source i.e. left image and the extra arm disappears.


And here is my resultant image :)

Final image after applying Photomerge group shot

Thursday, November 11, 2010

How to train the quick selection tool for making better selections in PSE ?

Quick selection is a great tool for selecting objects in any image. It intelligently selects the object distinctly from the background by detecting the brightness, contrast and tonal changes along the objects and their backgrounds. It takes just a little mouse drag with in an object to select an background.

For example : for the image below I just dragged my mouse from point A to point B for selecting the whole apple instead of moving my mouse along the edges of the whole apple which we would require for other selection tools.


This is how my object was selected moving my mouse from point A to B (Please note I increased the brush size to 35 px from options bar after selecting the quick selection tool for making this selection) :


However in the above image, there is good contrast between the object to be selected and its background. So we did not need to train our quick selection tool. But for getting better results in minimum time when there is not much great color difference or contrast between our object and background, it is recommended that you train your quick selection tool.

So in an image like below, where there is not that great color contrast between yellow flower and its background, we would train our tool.

So if I move my quick selection tool from point A to B to select the yellow flower, here is what
I get as selected :


However I did not need this extra highlighted(green) part in my selection(as shown below) which was selected when I moved my mouse from point A to point B. But since there is a low contrast between the orange and the yellow here, this area too got selected.


So instead of selecting my flower in one go as shown above, I follow the steps below to get my needed selection :

1. Select a very small part of the yellow flower as shown after selecting Quick selection tool.


2. Now I will press Alt key and keeping it pressed, I click and drag my mouse over the area I did not want in the selection. So  I brush my mouse over the green highlighted region shown in the second last image.

I also notice that as soon as I click Alt key my mouse cursor changes from "+" to "-" as it tell what area not to select.

Once I am done with that I leave the Alt key back and again move my mouse from point A to B as I did earlier and here is how I get my desired selection :


So here I have trained my quick selection tool not to select what areas of contrast. So if I had the similar background around the whole flower, then I would just drag my mouse once along the boundaries of the flower to tell my tool about the low contrast areas which I do not want to select.

Also keep in mind that if you have a large and random objects to be selected then you should keep subtracting the wrong selections you make as you sweep and not to defer the subtraction task in the end. This trains my tool at every step of selection and tell it what "not" to selection as it goes ahead.


I hope you find this tutorial helpful!

Tuesday, October 26, 2010

How to create stitching or embroidery text effect using PSE?

1. Open a blank document in PSE. Now select pattern stamp tool and increase the radius of the brush such that it covers the whole document.

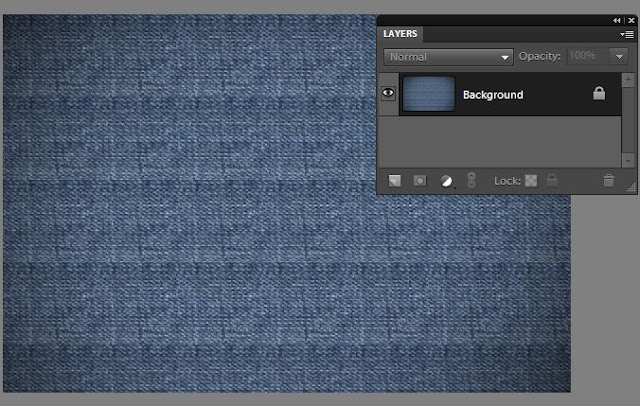
2. From the Pattern Picker in top bar, select the pattern Denim and stamp it over the document so that the whole document now is painted with Denim texture.


After Stamping, it looks like this :


3. Now select Text tool from left toolbar and write some text as shown. Choose the color you like. I chose Stencil Std font style from font picker combo box in top bar and pink color from the color picker.


4.  Now we will create Stitch brush. For this open a new file from File>New>Blank with default background selected. Now choose brush tool from tool bar with black color selected. Make the radius of brush around 9px with hard brush type selected in the top bar options.

Now put a dot and press shift to create a small slant straight line. Similarly create another such that you have drawn V-shape as shown. Once you are done, go to Edit> Define Brush


It asks to name the brush. Name the brush as Stitch.


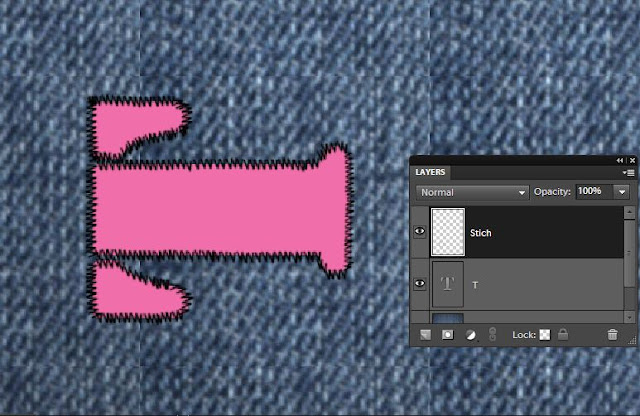
5. Once you are done, select the previous file we were editing from the project bin. Select the brush tool and the brush style as Stitch from the Brush combo box in the top bar. Create a new blank layer from layer menu and name the layer as "Stich".


Now on the edges of the text, start stamping the brush as shown. Please note we are stamping only along the horizontol lines as shown.


6. For vertical lines rotate the file by 90 degrees from Image>Rotate menu and complete the bruh stamping along the vertical lines which now appear as horizontal plane after rotate.


Once done rotate the image back.

7. Now select the Stitch Layer and go to Enhance>Adjust Sharpness. Increase the amount and radius as necessary.


Click Ok.

8.  Now keeping the Stitch layer selected, Go to Enhance>Adjust color>Replace Color. Select the color of the stitching or embroidery if you dont like the black stitching. I changed it to off white from black.


9. Once done, keeping the same above layer selected, go to Layer>Layer Style. Add Bevel to it(approx 9px in size).


10. Click Ok. Here is how your embroidered/stitched style look like :


Hope you find this tutorial helpful !

Friday, September 17, 2010

How to create flames using PSE 8?

Here is my first attempt in creating flames :

1. Open a blank document with black background.

2. Create a new blank layer and paint the lower bottom area as white with brush tool as shown below


3. Now rotate it right by 90 from Image>Rotate > 90 Right.

5. Filter> Stylize> Wind . Repeat it thrice using Control+F to achieve the following result


Rotate it back by 90 Left from Image>Rotate > 90 Left.

6. Now create another blank layer and use hard  brush to paint the area with red, orange and yellow as shown in the figure below. Select topmost layer and go to Filter>Gaussian Blur. Set the radius to 8. Here is how it looks like after this step.


7.  And now change the blending mode of this layer to Overlay (from Blending modes dropdown in layer palette). The output looks as shown below :


8. Now select the layer below(with wind effect, 2nd layer from bottom) and select Smudge tool from the left toolbar and start smudging it from bottom through up. It looks like this :


9. Now select the gradient tool and click on Edit button on topbar to define three gradient colors as shown in figure. Move the color stops such that left most is yello, middle stop is at Orange and right most at Red.


10. Now select the topmost layer in the layer palette and strike the gradient from bottom to middle.


11. Now Control+click on  the middle layer(Wind layer) and go to Enhance> Adjust Color> Replace Color. Replace the white color with yellow by selecting respective colors from the color swatches in the dialog.


12. Click Ok and here is the final output which I got.


How to write text in Gold using PSE?

Here are the simple steps to achieve this :

1. Open a blank document and paint the background as Black using bucket tool.

2. Now select Text tool and write the text in Black. If you control+click on the text layer in the Layers palette, you will see the text selected as below.


3. Go to Filter menu>Artistic>Plastic Wrap. The slider setting I used for this filter are shown below :


4. Press Control+F thrice and the output would appear like as shown below


5. Now go to Enhance>Adjust color and select the checkbox "Colorize". Adjust the Hue, Saturation and Lightness sliders as shown below.


6. Now go to Layers menu>Layer style>Layer settings. Add Outer and inner color with the Hues of yellow -rust color as shown below. You may add some Bevel to it as well and click Ok.


Here is my final output :


Tuesday, September 14, 2010

How to bring Ice effect in text?

I looked at few tutorials on this for Photoshop and tried the same in PSE. It's simple and cool effect.

1. Open a blank document with black background. Write some text with Black color on it.

2. Now Control click on the text layer so that the text gets selected as shown.


3. Go to Filter>Artistic>Plastic Wrap. Now repeat this filter 10 times by pressing Control+F 10 times. The result may look something as shown below.


4. Now go to Layer>Layer Style>Style settings. Select Glow>Outer glow and select the color from color swatch to be "79d9f9". The output may look like as shown below :


5. Now rotate the image by 90 Right from Image>Rotate>90 Right. Now from Filter menu>Stylize>Wind. Click Ok. The output text would appear like this :


Now rotate Left 90 to bring it back.

6. Now go to Filter >Distort>Liquify. Use the Warp tool at some of the places to warp some areas of the text to given more frozen ice effect. The output may appear like this :


7. You may add a little Bevel from Layer Setting dialog.


8. Now go to Enhance>Adjust Color>Adjust Hue/Saturation. And change the color of the text to some less saturated bluish grey.


Check the checkbox "Colorize".  Here is how it will look after that :


One may add Wind effect again by rotating as we did in step 5. Here is my final output after applying the effect again :