Following is a quick way to remove sweat from a face using Adobe Photoshop Elements. When you capture any sweaty face, the camera portrays the sweat as highlights. So removing those highlights, using the simple steps below removes the sweat, bring a matte look to the face. So here are the simple steps :
1. Open the portrait to be edited in PSE Editor.
2. Now create a new blank layer clicking on the new layer icon in the Layers palette.
3. Now change the blending mode of this layer as Darken
4. Now select Brush tool selecting a soft brush, opacity of brush set to somewhere around 15% -25%.
5. Now keeping Alt key pressed, click on an area near the sweat area on the skin which does not have sweat. For this image I clicked somewhere on the left of the lips on the lower cheek which does not have sweat highlights. It selects that skin color in the color swatch if you notice.
6. Now start dabbing with the brush on the areas of the seat highlights. Keep dabbing until you get all the highlights disappear.
Here are my initial and final images :
Once you learn the technique, it doesn't take more than 2 minutes to have this done.
This tutorial was on request from Morgan Drzewicki. Thanks Morgan.
Saturday, October 30, 2010
How to remove sweat from a face using PSE ?
Labels:
Adobe,
editing,
layers,
Photoshop Elements,
PSE,
PSE 8,
PSE 9,
removing sweat
Tuesday, October 26, 2010
How to create stitching or embroidery text effect using PSE?
1. Open a blank document in PSE. Now select pattern stamp tool and increase the radius of the brush such that it covers the whole document.
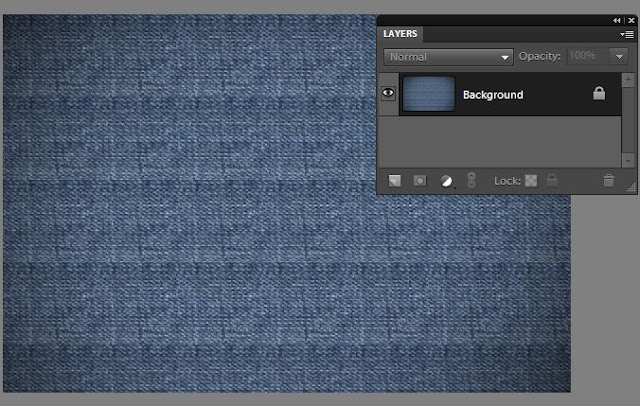
2. From the Pattern Picker in top bar, select the pattern Denim and stamp it over the document so that the whole document now is painted with Denim texture.
After Stamping, it looks like this :
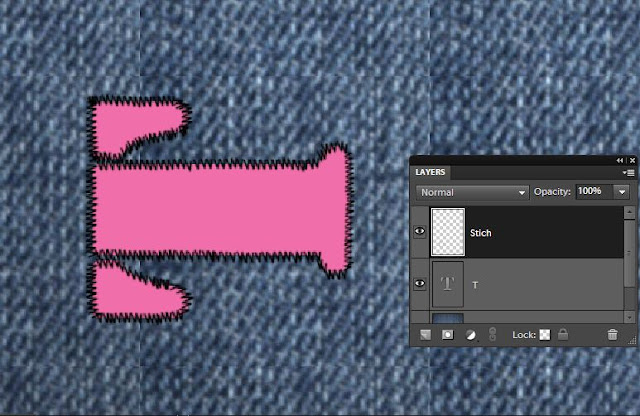
3. Now select Text tool from left toolbar and write some text as shown. Choose the color you like. I chose Stencil Std font style from font picker combo box in top bar and pink color from the color picker.
4. Now we will create Stitch brush. For this open a new file from File>New>Blank with default background selected. Now choose brush tool from tool bar with black color selected. Make the radius of brush around 9px with hard brush type selected in the top bar options.
Now put a dot and press shift to create a small slant straight line. Similarly create another such that you have drawn V-shape as shown. Once you are done, go to Edit> Define Brush
It asks to name the brush. Name the brush as Stitch.
5. Once you are done, select the previous file we were editing from the project bin. Select the brush tool and the brush style as Stitch from the Brush combo box in the top bar. Create a new blank layer from layer menu and name the layer as "Stich".
6. For vertical lines rotate the file by 90 degrees from Image>Rotate menu and complete the bruh stamping along the vertical lines which now appear as horizontal plane after rotate.

Once done rotate the image back.
7. Now select the Stitch Layer and go to Enhance>Adjust Sharpness. Increase the amount and radius as necessary.
2. From the Pattern Picker in top bar, select the pattern Denim and stamp it over the document so that the whole document now is painted with Denim texture.
After Stamping, it looks like this :
3. Now select Text tool from left toolbar and write some text as shown. Choose the color you like. I chose Stencil Std font style from font picker combo box in top bar and pink color from the color picker.
Now put a dot and press shift to create a small slant straight line. Similarly create another such that you have drawn V-shape as shown. Once you are done, go to Edit> Define Brush
It asks to name the brush. Name the brush as Stitch.
5. Once you are done, select the previous file we were editing from the project bin. Select the brush tool and the brush style as Stitch from the Brush combo box in the top bar. Create a new blank layer from layer menu and name the layer as "Stich".
Now on the edges of the text, start stamping the brush as shown. Please note we are stamping only along the horizontol lines as shown.
6. For vertical lines rotate the file by 90 degrees from Image>Rotate menu and complete the bruh stamping along the vertical lines which now appear as horizontal plane after rotate.

Once done rotate the image back.
7. Now select the Stitch Layer and go to Enhance>Adjust Sharpness. Increase the amount and radius as necessary.
Click Ok.
8. Now keeping the Stitch layer selected, Go to Enhance>Adjust color>Replace Color. Select the color of the stitching or embroidery if you dont like the black stitching. I changed it to off white from black.
9. Once done, keeping the same above layer selected, go to Layer>Layer Style. Add Bevel to it(approx 9px in size).
10. Click Ok. Here is how your embroidered/stitched style look like :
Hope you find this tutorial helpful !
Tuesday, October 5, 2010
How to create a portrait hard rock style using PSE 9?
2. Create a copy of the background layer by pressing Control+J
3. Now select the copy of the background layer and go to Enhance>Convert to Black and White.The following dialog will pop up. You may choose any preset available in the dialog or making changes using the sliders. Click Ok
4. Now Select this background copy and rename the layer as Overlay. Keeping this layer selected, change the blending mode of this layer to Overlay from the combo box.
6. Now select Burn tool from toolsbar and brush it over the highlights in the resultant image. You may try the combo box options with the blur tool on top toolbar - Highlights, mid tones, shadows.
Here are my initial and final images :
Subscribe to:
Comments (Atom)


