Tuesday, August 10, 2010

How to have text with different image backgrounds using PSE8?

1. Open a blank file with black background.

2. Now Use text layer from left toolbar and write something on it as shown ;

3. Now open any image you want in text background. Select the image from project bin and drag it over the text layer we created in previous step such that text gets hidden behind it as shown.


4. Now from Layers menu, select Clipping mask and you are done.

5. Here is how your final output may look like if you use different images for every text. Using mutliple images is simple. We just need to perform the above steps repeatedly for every text layer and we have to use a different image which should be placed above every text.

How to write circular text using PSE8?

To illustrate this, I am taking an example of a text that i want to write on the boundary of a ring.

1. First of all, on a blank file, I cut out a ring using cookie cutter tool. Here is how my picture looks like.


2. Now I select the text horizontal type tool from left toolbar and write some text a we do normally.


3. Now keeping the text selected as shown in the image above, select the Text warp icon on top tool bar. The text warp icons shows an arc below the text "T"

4. A dialog box opens up which would ask to choose the shape over which you want your text to be warped. I chose "Arc" from the dropdown. I can use the Bend and distortion sliders to workout with the amount of my text bending and horizontal/vertical distortion i would need to fit the text properly over my circle.


5. Once i click Ok, i can use the top three options as shown marked below to make my text more comfortable with the circlular shape. These options will alow me to rotate the text, shew it or scale it so that it can fot nicely over the shape. These options appear when we try to perform any transformations to the text layer by dragging any of the corners.


6. Here is how my circular text looks like.


One can be creative and innovative with the other shapes in the Warp text dialog.

How to create animated gifs in PSE8?

To give an example of animated gif, i have tried an example of an animation between a cloudy day and a sunny day. You can create anything while you try this out :

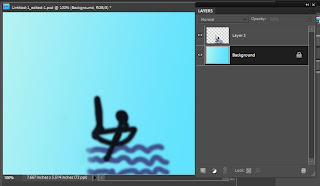
1. Take any background as shown in the image :


2. Draw  a boatsman like as shown below in a new layer or same layer :


3. Now draw some clouds in a new layer a shown below:


 4. Now draw a sun in a separate layer a shown below. If you hide the clouds layer created in step above, you would see the following :

5. Now merge the layer background and the boatsman by right clicking them and create a duplicate of merged copy. Now merge one of these duplicates with layer Sun and the other duplicate with layer clouds such that you have your layers palette as shown below :

6. Now go to File menu>Save for Web and select the format as Gif, check the checkbox "animate". Check the "loop" checkbox and specify the delay timing. I have mentioned the delay time as 1 second. So this means, my two layers shown above will appear alternatively after a delay of 1 second.

7. Click Ok and you can check out your animated gif playing in IE or Windows Fax Viewer.


PS : If animation is not visible in the image above , click on the image to open it in the new browser.