Tuesday, October 23, 2012

What's new in the new version of Adobe Photoshop Elements 11?

There is alot new and exciting in the new version of Elements.
I thought to brief the set of these new features before I get onto sharing more tutorials on them.

Elements Organizer 11

The new version of Elements Organizer offers alot of usability improvements along with new features and new UI. The top level things you would notice when you launch the new version may be:

1. Better UI and  simplicity in workflows from previous versions. As most of us remember our pictures though the people in them, or the place where they were shot or the events associated them, the new Organizer is built on this concept and provides an easy way to organize the media by bringing in the different views that are: People, Places and Events and provides an immersive experience organizing your media.

Here is the quick preview of the new Elements Organizer 11

Elements Organizer 11 UI
Elements Organizer 11


2. The new version allows media to be placed on Google maps and hence allowing organization through the Places. It's the first time ever Elements has integrated the Google maps.


3. Import to and Export from Adobe Revel: Media from Organizer catalog can interact with the Adobe Revel. So one can access the media stored on various devices like iPad, MAC and other machines etc in your Organizer catalog. Similarly export the media to your Adobe revel account from the Organizer catalog.


4. Auto suggestion of Events based on media timestamp for quick organization.


5. Auto organization through Flat folders. Alot of us do not want to spend alot of time creating albums and we generally tend to associate our media with the physical location on the disk and hence are more comfortable with using folders. Previous versions of Organizer lacked an ability to show the list of that folders only that have media imported in the catalog. Hence using folder view in Organizer was cumbersome as it used the get the complete folder hierarchy even if not needed. This version gives a quick access to your managed folders(from where media has been imported) and the tree as well if required.


6. Faster response with larger catalogs as compared to previous versions. There has been improvement in performance of launch of application, folder view(trememndously), and a few other areas like tagging, albums, full screen view etc.


Elements Editor 11 

A lot of new exciting features to give a try that includes:
1. New enhanced and simpler UI. Here is a screen that captures the new UI of Editor:
Elements Editor 11


2. New Guided Edits like high key and low key effects, Vignette effect.
Some examples with Before/After using these features:

Before applying High Key effect in PSE11
Before High Key applied
After applying High Key effect in PSE11
After High key applied

Before applying Low Key effect in PSE11
Before Low key applied
After Low key applied


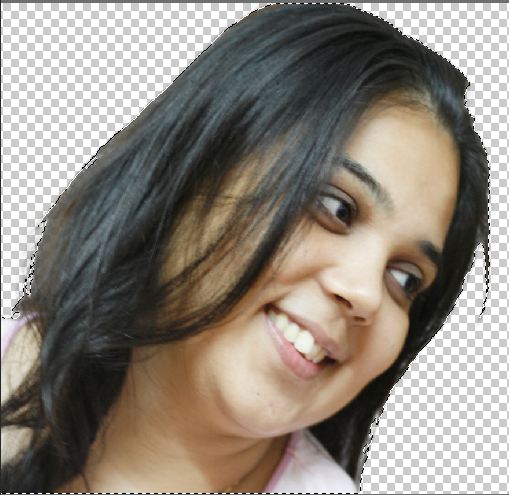
3. Enhancements in "Refine Edge" feature allowing more precise and natural selections for cases like selecting hair etc.


Refine edge

4. Some new filters that include Comic filter. An example output of comic filter:

Comic Filter in PSE 11

5. Allows to add new effects/actions easily from other websites and blogs which allows you to create more creative content.


I hope you would find this summary of the new Elements version useful. I will soon share more about these in detail.

Wednesday, June 13, 2012

Introduction to PSE Organizer

I have got a few requests to update this blog with some tips and troubleshooting for Organizer application as well. So here comes my first post for Organizer.I have a pretty big catalog* of photos and videos (around 20K media items) in my Organizer and I personally find this application pretty useful when I am looking for something in particular.

What is Adobe Photoshop Elements Organizer for?

PSE Organizer is a bundled application which comes with both the products- Adobe Photoshop Elements and Adobe Premiere Elements. This application allows one to get your media from device like cameras/card reader/scanners/ external drives/internal drives, organize your media(photos and videos) by tags/albums/folders etc, review them in full screen or compare modes, do some quick edits, rebound some creations like Photo slideshow which can further be output as pdf or wmv, share your media with your family and friends.

PSE Organizer is a value addition when you have thousands of photos in your catalog. One fine morning you might just want to re-bond your old memories of 1980s. However, looking for any photos of any particular event on your numerous drives and folders may just upset you. Now how easy would that be with this application? It would be simple to search by event tags, people tags, date or place which you could remember about those photos infact any metadata like camera used, date etc. Organizer provides extensive search capabilities for photo metadata. Once you search through your photos and reach the ones which you wanted to see, in some simple clicks, you can share it on Flickr, Facebook or other sharing services with your family and friends. 

PSE Organizer 10 also allows you to search for visually similar photos, or search for photos with a particular object like a building, a pet or a flower. Sometimes I just want to look at all the pictures that I have shot of my dog. to get them all together among several thousands gets difficult. PSE 10 allow you to simply mark an object in one picture and search for that object in all of your pictures.

One great value addition personally for me was Duplicate detection in PSE 10. I shoot a lot of similar shots in different angles of a scene or subject. And many a times I take multi-burst shots, out of which I generally keep 2 out of 10 shots taken in multi-burst mode of my camera. However it gets really tiresome to manually go and delete the rest 8 and stack the 2 keepsakes. And specially if I took 600 shots in a trip. Duplicate photo detection feature in this version quickly suggests the duplicate images based on both parameters- vsiual similarity between the photos and time taken. It works great for multi-burst shots or if you have clicked your pictures with both jpeg and raw format settings in your camera. You can quickly cretae stacks of such image.

There are plenty of sharing options in Organizer like email attachments, designer emails, Facebook, Flickr, youtube for videos etc. Having a variety of sharing options at one place is a boon when you know which of your friends are on flickr and some of them just reside on FB and you want to share your photos/videos with your friends.

One great feature is Organizer is People recognition. It allows you to save your memories of people in life by organizing them by people recognition workflow. 
At any time if I feel to do any detailed edits, I can send my pictures to PSE Editor from Organizer and choose to keep both the version in the Organizer catalog.

One good feature in organizer i that you can create and manage multiple catalogs. So if you want to keep your personal pictures separately from your business ones, you can create separate catalogs altogether.

*catalog is a term used in this application which refers to the database that stores all references of your imported media in the Organizer along with its association with albums, tags, star rating, captions and other metadata.So whenever you organize your media with any of these metaphors, the information gets stored in database.
When I used Organizer for the first time and deleted files from my catalog, I thought I am deleting those files physically. Infact, it took me a little while to understand that Organizer shows you all your media in its grid but it is not storing media physically but it is just referencing my media with its physical location. So unless I specifically say "Delete from hard drive" while deleting files from Organizer, I am just removing the references of my media from the catalog.

There is a lot to explore in this application and since you deal with thousands of files altogether, it is natural to face more issues. Through this part of blog, I will also try to help with some troubleshooting steps for these kind of issues.


Tuesday, December 6, 2011

How to create picture stacks using PSE10?

The following two pictures illustrates the "Picture Stack" effect available in PSE10.

Original image
After Picture stack effect was added


This new feature in PSE 10 allows you to get this effect in a couple of minutes<probably less than that>.

Here are the steps :

1. Open the source image in Editor.
2. Go to Guided Edits
3. In the Photo Play category, select "Picture Stack"

2nd option in the category.


4. The next screen appears showing three steps :

In first step, you can choose the number of pictures in the stack you would like to see. The options are 4, 8, 12.

Once you select that, you can select border width of each photo frame. Teh three options are : Small, Medium and large.

The third ioption allows you to fill the background areas which are shown behind the frames with a solid color or gradient.

In these three clicks your output is ready.


However you may tweak the results like rotating any picture stack or moving it to a different orientation etc in the Full edit.

Select the Move tool in full edit and use it for moving any picture stack to a different position and commit the operation.


Once commited, the result would appear as shown :

Final result

Let me know if you find this useful!

Wednesday, April 20, 2011

How to quickly make a perfect group shot from a couple of images?


It happens alot of times that while taking a group shot, there is atleast one person who is looking somewhere else. So we ask to pose for another shot. However now someone else from the group is not in perfect smile or moving his hands here or there.

Getting a perfect group shot is too simple using PSE.

1. Open the two group shots which are not so perfect and go to File>New> Photomerge Group Shot or Guided Edit > Photomerge> Group Shot

For example :


The above screen appears. Select the base image where most of the people appear perfect and drag it to the empty space on the right where as the source image at left.


If you see the above pictures you would notice that in right image(our base image) , the person on the left has his arm raised. While in the left image, the person at the back has his arms raised.

So we want to have one picture out of these two were none of the guys have their arms raised.

2. Select the pencil tool from right panel and create a selection like the one show below (V-Shaped), where I selected the person on left who appears fine.


As soon as you leave the mouse drag, you would see the results as shown :


But if you see closely, there is a problem in this result which is highlighted as shown below :

Problem highlighted in pink box

So the person highlighted in pink box is having another arm in the result image on right.

It is just one more step. Just select the eraser tool from right panel and rub over the arm area in the source i.e. left image and the extra arm disappears.


And here is my resultant image :)

Final image after applying Photomerge group shot

Saturday, April 16, 2011

How to remove an object from a scene and create background content to fill the hole using PSE9?

Is there a tool in PSE which can help you remove an object or a person from foreground of an image by filling it with the background content?

Yes, there is one which was introduced in PSE 9. So here are my initial and final images to show what this tutorial will help you achieve through this tutorial:


     Initial image


Final image


So in my source image above, I wanted to remove the girl from the temple and have just the building.

It may be achievable with clone tool, however it would really be a big time task.

For non-complex images, it may just take seconds to fix that photo using content aware spot healing by doing just a couple of dabs
.
However, I choose an image which is complex as we need to remove a person whose background is not consistent throughout. It has the dark area inside the gate, the gate boundaries, the sculptured wall, the ground with variations in textures and colors. And spot healing from previous versions of PSE might not work since it does not have that intelligence to create content from background and fill it with it.

1. Open the image in Editor.
2. Select Spot healing tool from the left tool bar. 


The spot healing brush properties in top properties bar


3. Now keeping "Content-Aware" option selected in Properties panel, a keeping brugh size of the area not very big(which can be incremented and decremented using ],[ keys), start brushing(dabbing) over the object you want to remove.

So here are some tips which I have learnt on using this tool again and again :


1. In the image above, for areas marked in red, I could use a bigger brush size without worrying much as the background behind the red mark is not very complex and is consistent, and I am not worried much as there are change in colors, no linear planes changing etc. So I can do this part quickly.


2. The areas marked in yellow are bit complicated as they have carvings on the wall. So would be good to start dabbing the brush with small size from the area near to the yellow area boundary in a linear manner. So if you see the carvings on the wall, they are horizontally linear. So it would be good if I start from the left near the boundary of the yellow area towards right horizonally.


3. The areas marked in blue(In L shape) is the area which should be taken care alittle meticulously since it has the frame of the door which has straight lines which need to be content created. So for this I reduced the brush size so that it did not cover the breadth of the frame and started from left such that the brush area includes the area of the existing frame(white frame area). However, this decision making may vary from image to image which would come to you as you try this tool a few times. For non-complex images, it may just take seconds to fix that photo using content aware spot healing and you may not have to do any such decision making. But for complex images, you might need a little thinking to get the best results.


4. For the area in purple, I used clone tool as it was quicker for that scenario. Spot healing content aware brushcould also have been used.

Here is my final result :


Hope this tutorial helps!!!


Tuesday, April 5, 2011

How to add Saturated Film Effect to any photo using PSE9?


1. Open an image in PSE Editor.

2. Go to Guided Edits and click on Saturated Slide Film Effect under Photographic Effects.


3. Click on Apply button. It can be applied multiple times depending on the extent of the effect you are looking for.

Here are my initial and final images:


Initial image 
 

Final Image


Monday, April 4, 2011

How to quickly add vignette to a photo using PSE 9?

There are different ways in which you can add vignette to a photo. However when you are looking for the quickest(single step) and easiest way to do it, you may do the following.

1. Open the image in Editor. This is the image I opened.


2. Go to Guided Edit by selecting the Guided tab in the right Edit pane. From the guided pane, choose Lomo Camera Effect under Fun Edits.   


Click on Apply Vignette button <skipping the first Cross Process Image button.


Here are my initial and final images :


If you want more vignette, you may press the same button twice or thrice as per your need.

Tuesday, March 1, 2011

Creating Depth of Field using Adobe Photoshop Elements 9.0

Selecting the background and blurring it can just pop up your subject but does not give a sense of depth of field.

Following is the tutorial for bringing depth of field to your photos. It uses PSE 9 layer masks and gradient tool.

Original Photo

Final edited photo with Depth of field


Here are the steps to add DOF to any photo :

1. Open an image in PSE Editor.


 2. Press Control+J to create the copy of the background layer.

 3. Keeping the copy of the layer selected in the layers palette, go to Filter>Blur>Gaussian Blur to blur the layer such that the image looks blur to an extent of the maximum blurriness you would expect in your final photo.


4.   Now go to Layer>Layer mask>Reveal all. Also make sure that your color swatch in left tool bar has default colors selected as Black and white.


5. Now select the Gradient tool from left tool bar.


6. Stroke the gradient tool in the direction where you want to represent the depth of field. So in the image used in example depth of field goes from the point where the front cub is standing to the direction where second cub is sitting behind. So I moved the Gradient tool across the red path marked below.


7. Here is how my output looks after applying the gradient and my sharp background is blurred in proportion to the distance from the front subject.


Sunday, December 26, 2010

Thinify nose of a portrait using Adobe Photoshop Elements


Thinifying nose takes just two minutes in PSE 9.

1. Select Magnetic Lasso tool from left tool bar. Make a selection around the nose. Right click the selection and select Layer via Copy to create a new layer of the selection.
2. Press Control+T for performing transformation. Move the left and right sqare boundaries inwards to thinify the nose as required.
4. Now select Spot Healing brush and brush away the distorted spots created around the nose in the last step.

Thursday, December 16, 2010

How to bring sheen to hair using Adobe Photoshop Elements?

The hair in the image below looks dull and lacks shine. In 3 easy steps one can add shine to the hair using PSE 9.


 1. Open the image to be edited in PSE 9 Editor. Create a duplicate copy of the background layer using Control+J or dragging the background layer to the new layer icon in the layers palette( 1st icon below the layers).

Select the background layer in the layers palette and click the new layer icon which is the first icon in the layers palette below the layers.

This is how the layers palette should now look like. There appears a blank layer between the background layer and the background copy.


2.  Now click the top background copy layer in the layers palette and press Control +G or select Layer>Create clipping mask.


See the top layer gets indented in the layers palette indicating that a clipping mask got created.

Change the blending mode of the blank middle layer to Linear Dodge(add). You can do this simpley by selecting the middle layer in the layers palette and changing the blending mode from Normal to Linear Dodge(add) from the combo box in the layers palette.

3. Now select the brush tool from tools bar. Keep the default colors in the color swatch(black and white as default).
Choose the brush size from top bar as 60px of soft mechanical brush type.

Change the Opacity of the brush to 20% from top bar. Remember if the hair color is not not dark as shown but some lighter color, reduce the opacity to half this value(around 10%).


Keeping middle layer selected, start brushing over the area of the hair you want shine to appear.

Here is how my initial and final images look :                 

Initial Image


Final Image